Installing LAMP stack manually using apt.
This instruction will be applicable to all Debian and Debian based distros like Ubuntu, Kubuntu, PopOS, etc.


Installing any kind of software or applications can be challenging in a Linux environment. I will be writing some guidelines to install some services required for a web development stack. To install any kind of software into a Linux system, it is always better to install using the terminal. The default package manager for Debian and family is apt and Most of the common packages can be installed via apt. Ubuntu has snap, which has a ton of applications built for Ubuntu, but I don't like installing any kind of software via snap unless there is no other choice (but that is just my personal opinion).
To install the LAMP stack in a Linux system, we need to install some dependencies along with the services. LAMP stands for Linux, Apache, MySQL and PHP. It is just the tech stacks used to develop a website.
Installing Apache2
The Apache web server is available in the apt repository by default. We can install it by using one command:
sudo apt update -y
sudo apt install apache2 software-properties-common -y
It is always recommended to update your apt repository before downloading anything from it so that you can install the most recent package. I also installed software-properties-common along with the apache2 package so that some common dependencies may be installed automatically.
To confirm your Apache installation, run this command to display its version:
apache2 -v

Installing PHP
PHP comes pre-installed in Ubuntu and most distros, but the apt repository does not have a PHP repository, and since we need to install some PHP extensions, we first need to add the repository of PHP in the apt sources list.
sudo add-apt-repository ppa:ondrej/php
sudo apt update
Of course, we need to update our apt repository after adding PHP. Then, we will proceed to install the PHP version of our choice, along with some extensions:
sudo apt install php8.1 php8.1-{curl,common.mysql,cli,gd,xml,mbstring,zip} php-json
I am using PHP version 8.1 for the sake of convenience. You may choose the specific version you want; the extension's name is the same anyway.
Installing Composer
We need to install Composer because it is a tool that manages dependencies and libraries for our PHP Laravel framework. It helps users develop projects, install third-party libraries, and scaffold a project as well.
To install Composer, you can either head to the official Composer Website or you can use some terminal tools like curl to install it:
curl -sS https://getcomposer.org/installer -o /tmp/composer-setup.php
sudo php /tmp/composer-setup.php --install-dir=/usr/local/bin --filename=composer
To confirm your PHP and composer installation, run their respective commands to display their versions:
php -v
composer --version
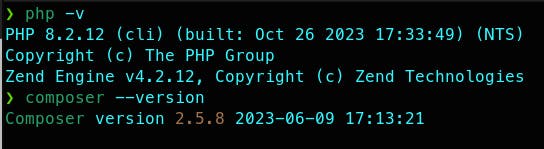
If you see an output similar to the above image, then it means you have successfully installed PHP and Composer. Now you are ready to go to the next step.
Installing MySQL/MariaDB
Choosing whether to install MySQL or MariaDB is totally up to you. They both are relational databases and 99% identical. They serve the same purpose and yes you can use all mysql commands with MariaDB, including systemctl commands. which means, if you install MariaDB and type sudo systemctl status mysql, you will still be able to see status of MariaDB. This is because MariaDB is built on top of MySQL engine and ti can share all mysql commands.
Now we will install it:
sudo apt install mariadb-server -y
sudo mysql_secure_installation
mysql_secure_installation will automate the initiaton of the database service. There is no password for the default user root and you can set it during this secure installation. Read the prompts clearly and all you have to do is answer 'yes' or 'no'. Finally, when prompted to reload or flush the privilege table, answer 'yes'. Now, you're done with MySQL/MariaDB install. You can now log in to MySQL shell by using this command:
mysql -u root -p
Press 'Enter' and type in your password. If you haven't changed your root password during mysql_secure_installation, then you can just hit 'Enter' when the password is prompted. This is because there is no default password and I strongly recommend to set one. Even if it is a weak one.
Once you're in the database shell, you need to create one empty database to be used for your Laravel project.
CREATE DATABASE demo_project;
Then you can simply exit MySQL shell by typing 'exit'.
Creating your first Laravel project
Composer is a very handy tool to scaffold a new Laravel project. We can create a new project by executing a single command:
composer create-project laravel/laravel demo-project
Keep in mind that this command will create a directory called 'demo-project' in which ever directory you are currently running the command on. So if you are the type of guy who organizes all your projects into one directory like: ~/projects, you may want to cd into your ~/projects directory first before running the composer command above.
All packages and dependencies will be downloaded by Composer into that 'demo-project' folder. After download and scaffolding is done, cd into 'demo-project' and take a look at the '.env' file first.

Look for these lines and replace the database name, database username and password according to yours. Save the file and now you can serve your newly scaffolded project by running the following command in you project root directory (i.e. 'demo-project'):
php artisan serve
Then after it is up, it will provide a link like this: http://loaclhost:8000
You can Ctrl + Left Click to directly open in your browser. Now you customize or modify the project to your liking. Laravel is a huge framework and it can do a lot of things, the framework itself takes time to learn. If you are familiar enough with this framework, you can create beautiful things using it. After all, it is the framework that keeps PHP alive to this day.
Thanks for reading and I hope I can help you resolve an issue with the information provided. If there is any misinformation, doubts or errors regarding this, feel free to correct me or contact me for further troubleshooting.